Difference between revisions of "Data input tutorial"
| Line 30: | Line 30: | ||
Once the Block node is selected click Add button in the Representations column. This button will open a panel with the files you’ve uploaded via FTP: | Once the Block node is selected click Add button in the Representations column. This button will open a panel with the files you’ve uploaded via FTP: | ||
| − | |||
[[File:Image006.png]] | [[File:Image006.png]] | ||
| − | |||
Select the files and drag’n’drop them to the Representation column: | Select the files and drag’n’drop them to the Representation column: | ||
| − | |||
[[File:Image007.png]] | [[File:Image007.png]] | ||
| − | |||
[[File:Image008.png]] | [[File:Image008.png]] | ||
| − | |||
Click Yes. The processing might be a time consuming task. After it has started you can close the browser and login later to check the progress: | Click Yes. The processing might be a time consuming task. After it has started you can close the browser and login later to check the progress: | ||
| − | |||
[[File:Image009.png]] | [[File:Image009.png]] | ||
| − | + | == Processing is finished == | |
| − | ==Processing is finished== | ||
| − | |||
After some time the processing is finished: | After some time the processing is finished: | ||
| − | |||
[[File:Image010.png]] | [[File:Image010.png]] | ||
| − | |||
That’s it – your images are stored in N3. | That’s it – your images are stored in N3. | ||
== Tools you get right out of the box == | == Tools you get right out of the box == | ||
| − | |||
These basic tools are available right after the processing is complete. | These basic tools are available right after the processing is complete. | ||
#High (virtually unlimited) resolution viewer. Double click on one of the Representation nodes and click OpenZoom button:<br/>[[File:Image011.png]]<br/>It will open the viewer (use mouse (click, drag, wheel) to navigate):<br/>[[File:Image012.png]] | #High (virtually unlimited) resolution viewer. Double click on one of the Representation nodes and click OpenZoom button:<br/>[[File:Image011.png]]<br/>It will open the viewer (use mouse (click, drag, wheel) to navigate):<br/>[[File:Image012.png]] | ||
#Film strip viewer. It’s available from Block node (double-click on a block to open the window):<br/>[[File:Image013.png]]<br/>The filmstrip viewer shows all the Representations belonging to the Block (similar to files in a folder):<br/>[[File:Image014.png]] | #Film strip viewer. It’s available from Block node (double-click on a block to open the window):<br/>[[File:Image013.png]]<br/>The filmstrip viewer shows all the Representations belonging to the Block (similar to files in a folder):<br/>[[File:Image014.png]] | ||
| + | |||
| + | == Data sharing == | ||
| + | You can copy viewers URLs and share them (email, skype etc.) without accessing the main data management interface. The Private data is protected by username/password, the recipients should be associated (i.e. have an account) with the Project in order to access the data. | ||
Revision as of 16:53, 12 December 2014
Contents
Upload files
The first step is to upload the files using any FTP client (e.g. FileZilla) to your personal temporary folder, the URL is ftp://cmbn-navigator.uio.no:2121
Note the non-standard port number:
After the upload is finished you can login into the main data management interface: http://cmbn-navigator.uio.no/navigator/ You should see your project there. Please double-click on the project node and rename it/add metadata:

Click Save button.
Create Animal
Now you are ready to create the Animal. Click Add button in the Animals column. You should see this:

Please provide the metadata, the red fields are mandatory. Click Save button. Select the created node by clicking on it:

Create Block
The similar way you create the Block – click on Add button in the Block column, fill in the metadata, click Save button and select the created Block node:

Representations: process the uploaded files
Once the Block node is selected click Add button in the Representations column. This button will open a panel with the files you’ve uploaded via FTP:
 Select the files and drag’n’drop them to the Representation column:

 Click Yes. The processing might be a time consuming task. After it has started you can close the browser and login later to check the progress:

Processing is finished
After some time the processing is finished:
 That’s it – your images are stored in N3.
Tools you get right out of the box
These basic tools are available right after the processing is complete.
- High (virtually unlimited) resolution viewer. Double click on one of the Representation nodes and click OpenZoom button:
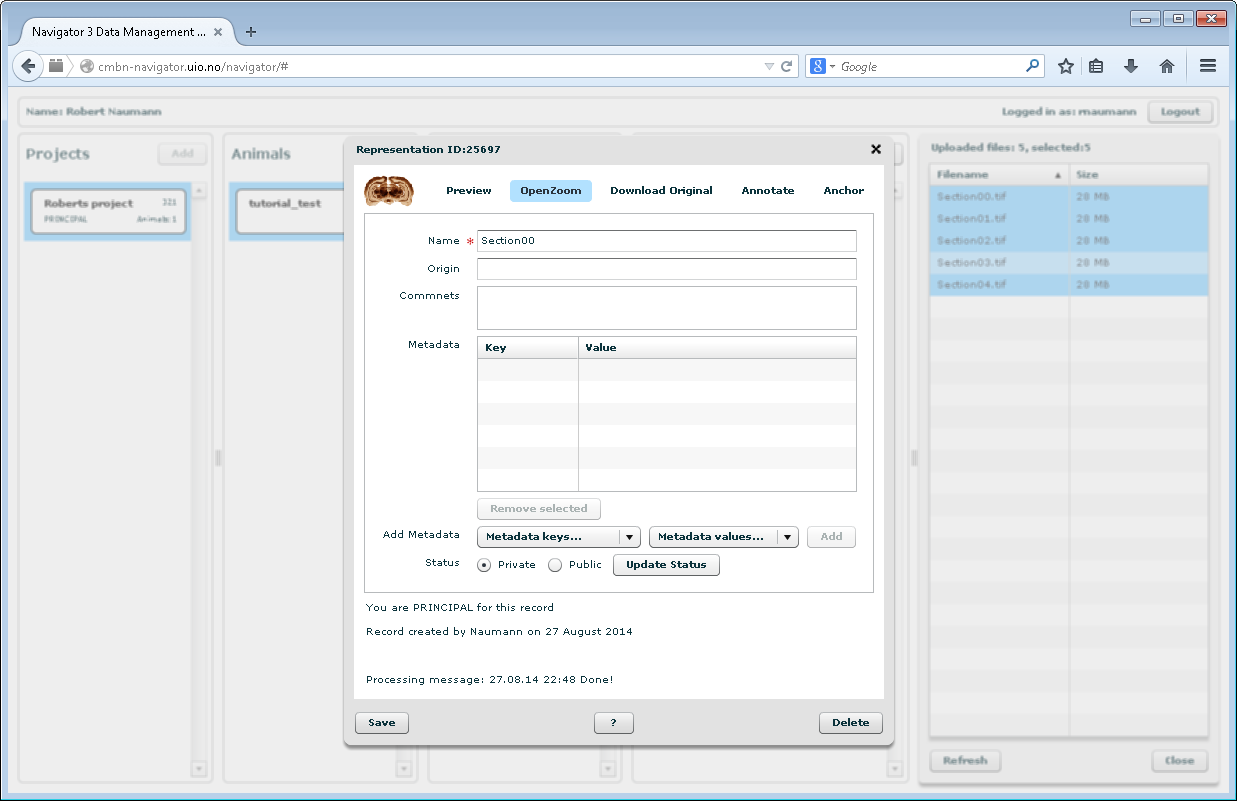
It will open the viewer (use mouse (click, drag, wheel) to navigate):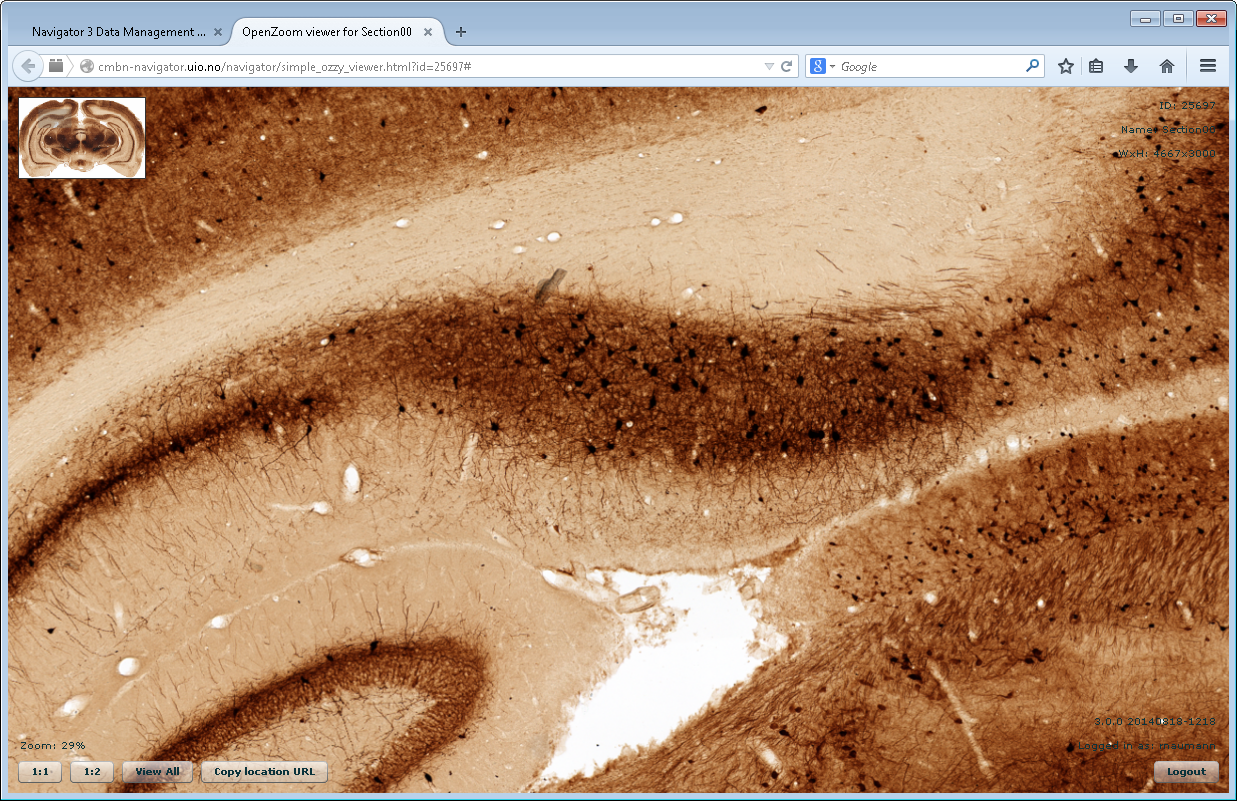
- Film strip viewer. It’s available from Block node (double-click on a block to open the window):
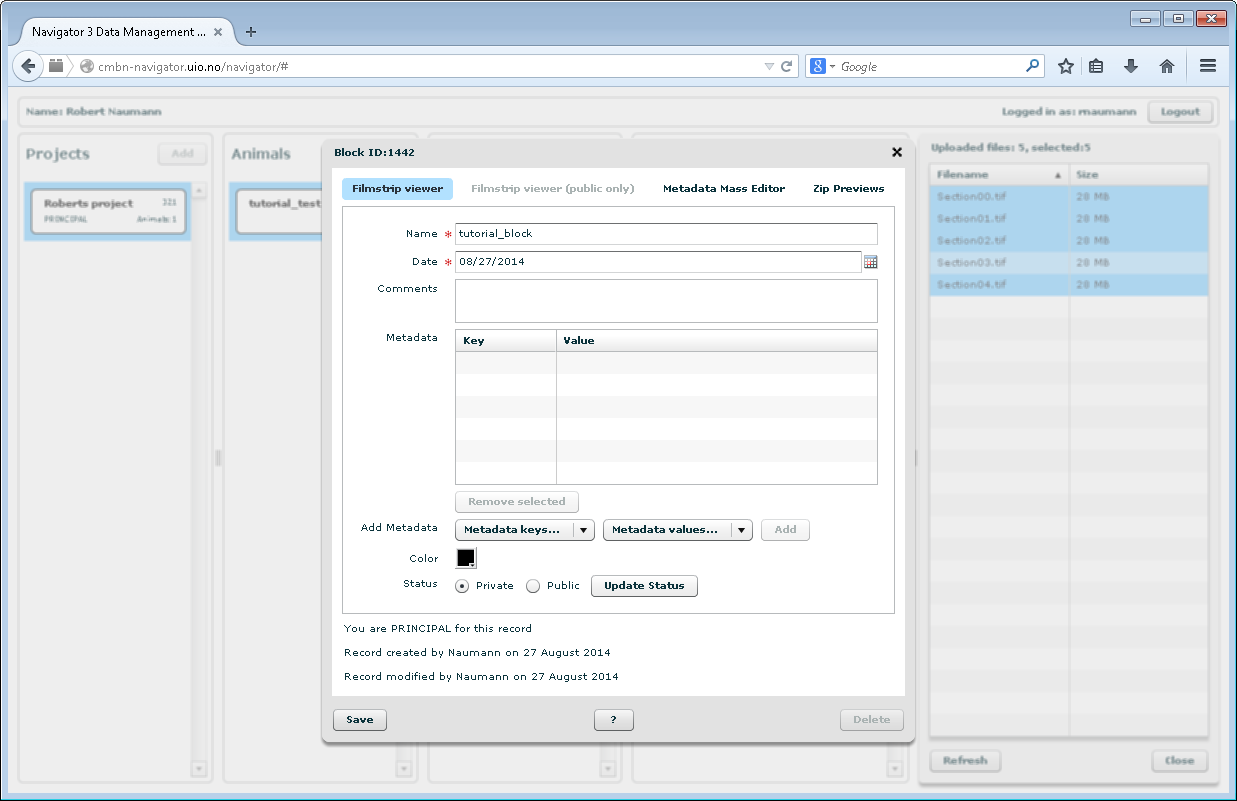
The filmstrip viewer shows all the Representations belonging to the Block (similar to files in a folder):


Data sharing
You can copy viewers URLs and share them (email, skype etc.) without accessing the main data management interface. The Private data is protected by username/password, the recipients should be associated (i.e. have an account) with the Project in order to access the data.